

How To Add Line To Word Document
How to Insert a Horizontal Line in Word
Many people choose to piece of work with Microsoft Word for its extensive features and the ability to customize their documents. With tools such equally inserting a line in Word, you can hands create separate sections, add visual involvement to your folio, and add that extra professional touch to win over your readers.
In this article, you volition learn how to insert a line in Give-and-take, and how you tin can change how your lines await in all versions of Word.
To insert a line into a Discussion document using the congenital-in Horizontal Line tool:
- Place the cursor where you want toinsert aline.
- Become to the Home tab. ...
- In the Paragraph group, select the Borders drop-downwardly arrow and chooseHorizontal Line.
- To change the look of theline, double-click theline in the document.
Let's discuss these steps in detail!
Method 1: How to Insert a Horizontal Line in Word
Microsoft Word comes with a built-in tool specifically for inserting all kinds of horizontal lines. You can find it by following these instructions:
- Place your blinking cursor where y'all desire to insert a line in your certificate.
- Open the Home tab from the Ribbon interface on top of your screen. This is the default tab when you create or open a document.
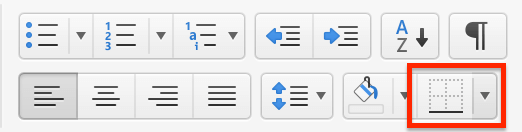
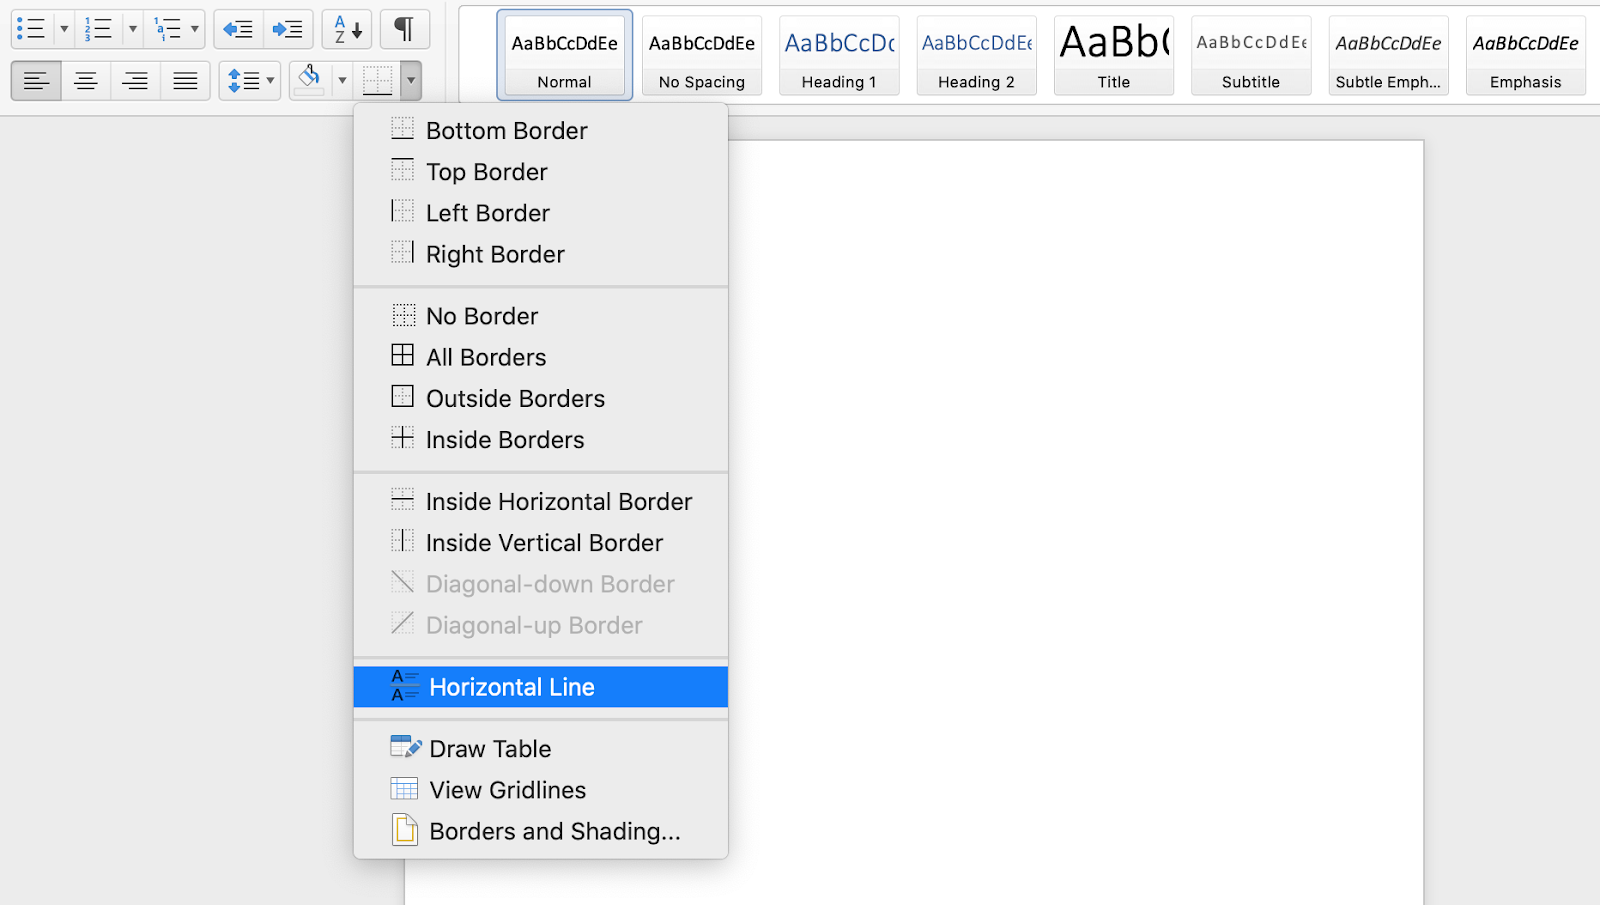
- In the Paragraph section, click on the arrow side by side to the Borders icon (every bit shown in the image below).
- Choose Horizontal Line from the driblet-down menu. This will insert a plain, solid line into your document which you can leave as is, or customize.
- To customize the line, double-click on it one time it's in your certificate. The Format Horizontal Line dialog box will open in a new window.
- Alter all of the attributes you want to modify and click the OK button.
Method 2: Use keyboard shortcuts (AutoFormat) to insert a line in Give-and-take
By far the most efficient mode of inserting a line in Give-and-take is the AutoFormat characteristic , especially when looking for manner.
This only allows you to insert horizontal lines, notwithstanding, it gives you the ability to choose from a variety of styles. All you lot need to practice is type the right symbols and striking the enter cardinal on your keyboard to automatically insert a full-page length line.
Here are all the lines you tin can insert by using the AutoFormat shortcuts in most desktop versions of Word:
- To insert a solid single horizontal line : Type three hyphens (---) & Press Enter

- To insert a solid double line : Blazon three equal signs (===) & Press Enter

- To insert a Dotted line : Blazon iii asterisks (***)& Press Enter

- To insert a Bold single line : Type iii underline symbols (___) & Press Enter

- To insert a Wavy line : Type three tildes (~~~)& Press Enter

- To insert Triple line with a thick center : Blazon iii number signs (###) & Press Enter

All of these lines adjust to the full length of your certificate, or when inserted into a column, adjust to the width of the column.
Method 3: Utilize the Shapes office to describe a line in Word
The 3rd way of adding a line to your Word document is by using the Shapes within the application. This allows you to draw both horizontal and vertical lines, or lines going in any direction. Here's how yous can utilize this tool in Discussion.
- Place your blinking cursor where you want to insert a line in your document.
- Select the Insert tab in the Ribbon interface, which can exist plant on the top of your screen.
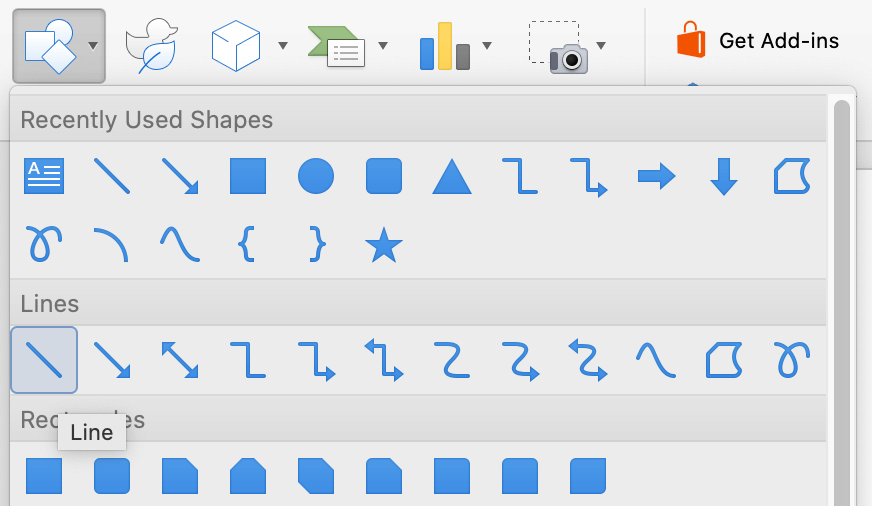
- Expand the Shapes group inside the Illustrations section, as shown below on the image.

- In the Lines grouping, select a line that you want to insert.
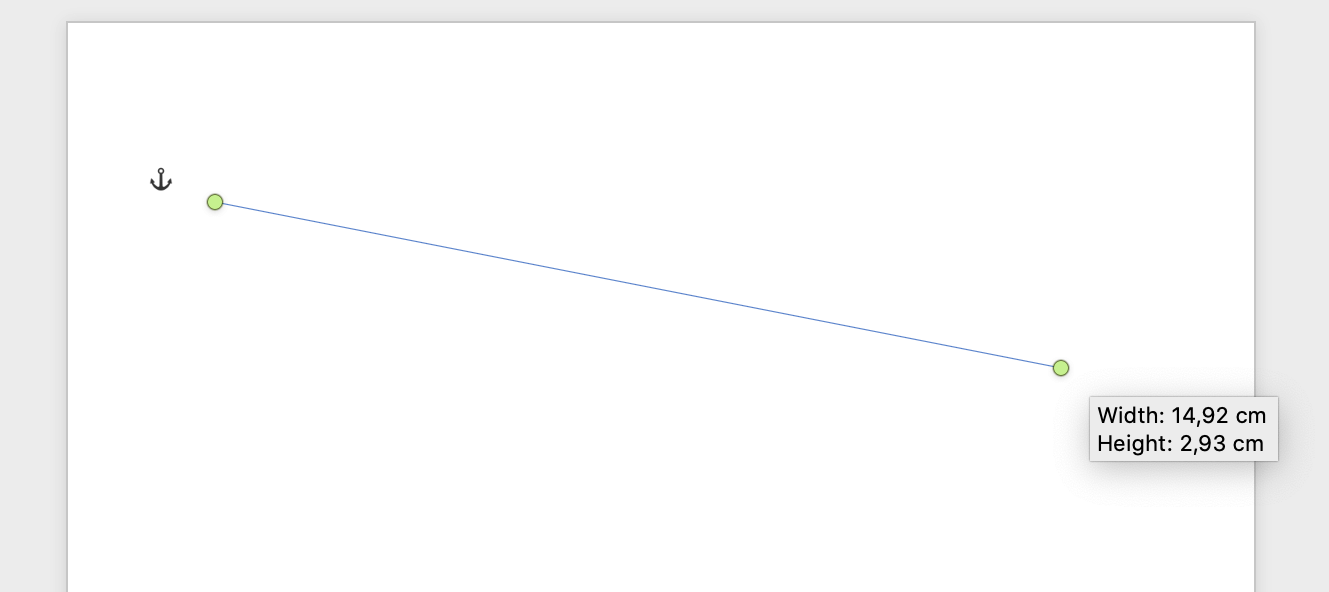
- Click and drag your cursor inside your certificate to draw a line. You tin hold the Shift key to make certain your line is perfectly aligned.
- Let go of your mouse push button to insert the line into your document.
- To customize your line, select information technology by clicking on it once and opening the Shape Format (or just Format in some versions of Word) tab in the Ribbon.
Final thoughts
We hope that this article was able to assist you acquire how to insert a horizontal or vertical line in Word. Y'all're now able to further customize your documents and deliver more than professional person products.
Now that yous're a PRO in inserting a line in Word, consider subscribing to our Newsletter for more tips and GET 10% off Your Purchase!

How To Add Line To Word Document,
Source: https://softwarekeep.com/blog/how-to-insert-a-horizontal-line-in-word
Posted by: wallaceuple1986.blogspot.com
0 Response to "How To Add Line To Word Document"
Post a Comment